ISO Installation
This section will walk the user through booting the LiveCD and bootstrapping the first hypervisor.
UEFI Boot
| Only UEFI mode is supported. Legacy BIOS mode may work, but it is strongly recommended to use UEFI mode instead. |
-
Boot the server and enter the boot menu selection screen, in the example below the boot menu selection screen is entered by pressing F6. On some servers this could be another function key.
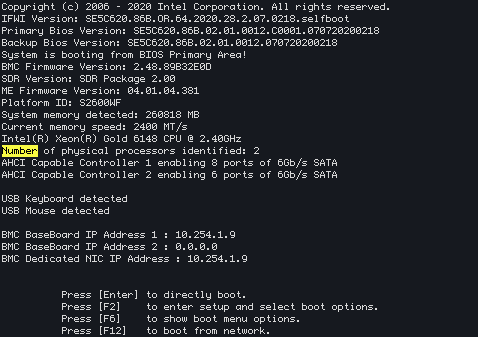
-
Select the USB flash drive that was inserted.
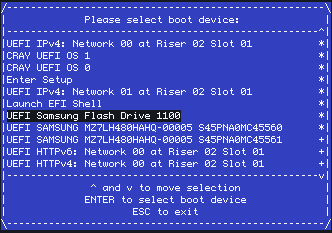
-
A GRUB screen should display next, either wait for the timer to run out or press Enter to move forward.
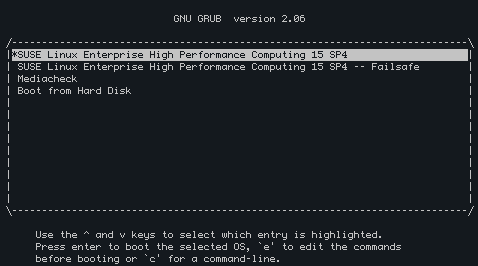
-
After booting, the login prompt should be presented
fawkes-live login: -
Login as
rootwith a blank password, the system will immediately prompt for the password to be changed/set.This will only set the password for the LiveCD rootaccount, this does not carry over to the booted Hypervisor image.fawkes-live login: root Password: You are required to change your password immediately (administrator enforced) Changing password for root. Current password: New password: Retype new password: ____ ____ _ __ _____ ___ | __/ _ \ |\/^\/|| | / // ___// _\ | |_ | /_\ ||\/ \/|| |/ / | |_ | |_ | _|| _ ||\/ \/|| | | _/ \__ \ | | | | | || || |\ \ | |___ __| | \_| |/ |/ \_/V\_/|_| \_\|____//___/ CRAY-HPE Fawkes LiveCD
Pre-installation
These steps will be carried out on the LiveCD for preparing the Fawkes installation.
Prerequisites
-
A network with an active DHCP server or a known static IP address
-
A trusted workstation or server that is peripheral to the fawkes cluster with access to the cluster
Network access
This segment is necessary for installing SSH Key(s) into the server.
-
Setup
udevrulescrucible network udev -
Set up network access
-
Using DHCP
crucible network interface --dhcp lan0 -
Using a static IP
Optionally set a DNS server by appending --dns <server IP>, additional servers may be specified using a comma delimited list (e.g.--dns <server IP N>,<server IP N+1>) . For more examples with Crucible, see Network Interface Setup Reference.crucible network interface lan0 A.B.C.D/E (1)1 A static IP address in CIDR notation.
-
-
Exit the console, or leave it open and move to a new terminal session on a trusted workstation. Proceed to the SSH Key(s) section.
SSH Key(s)
Create SSH keys that will be used to login to the initial hypervisor and management VM. This segment must be performed on a trusted workstation or a peripheral server with connectivity to the Fawkes cluster.
DO NOT PERFORM THIS SEGMENT IN THE FAWKES LIVECD! The SSH public key(s) generated here will be installed into the resulting hypervisor image, their matching private keys need to exist on another computer that can access the hypervisor once this LiveCD is shutdown.
The steps below will walk through creating a sufficient key.
-
Generate or provide one or more SSH public keys.
Fawkes recommends generating an EdDSA ( ed25519) key-pair, but other ciphers such as RSA are acceptable. The guide below usesed25519.DO NOT PASTE PRIVATE KEYS INTO ANY OF THE FOLLOWING TERMINAL SESSIONS. The contents should come from a file with a .pubsuffix, this is the public key. Pasting the private key can compromise that key and prevent login after the disk installation completes.Generate a key on a trusted workstation, and copy/paste a public key into a new file:
-
With a passphrase:
ssh-keygen -t ed25519 -
Without a passphrase:
ssh-keygen -q -t ed25519 -N ''
-
-
Copy the public key to the LiveCD, authenticate with the password that was set in UEFI Boot if the passwordless SSH step was not completed.
scp -p <path/to/key>.pub root@A.B.C.D:/root/.ssh/
Installation
This segment will wipe the server and install the hypervisor image to disk.
-
Return to the previous console session, or start a new SSH session.
-
Wipe the server.
This will wipe all storage disks on the server with exception to USB devices. crucible storage wipe -
Install the OS to disk.
By default all /root/.ssh/*.pubpublic keys will be installed into the hypervisor. To limit this to a single key, or to use a different directory, pass-s </path/to/keys>when invokingcrucible.crucible install -
Reboot to disk
At this time the hypervisor does have a password login similar to the LiveCD. Entering a blank password will prompt you to create a new password. This is only allowed during prototyping, and will be removed in an upcoming alpha release.
The install will have also copied all the data from /data to a /vms/assets directory. This directory is available once the hypervisor has booted.